Build a Horseshoe Pit
Posted on : 26-05-2009 | By : admin | In :
7
Building a horseshoe pit is a great project. It is not too difficult and most people can easily complete the project.
SAFETY FIRST
Before You Dig
Before you start you want to make sure that you can safely dig in the area you are putting in the pit. Every locality has their own phone number that you can call to have all underground pipe, cables, and other things you don’t want to hit, cut, break, sever, etc when you dig. Please CALL BEFORE YOU DIG!!! I can’t stress this enough. It is expensive to pay for the phone or cable company to repair your mistake but it is also possible you could be severely injured or even killed if you get into a gas or power line.
Eyes, Ears, Fingers, and Toes
Please make sure you use proper eye protection, hearing protection, and hand and feet protection. Safety glasses or goggles are a must for when you are sawing and screwing. Also, some ear plugs will help you from hurting your ears when you run the saw. Also, don’t forget to wear a good pair of boots to protect your feet. Finally, a good pair of leather fitted gloves will give you protection and enough dexterity and control to complete the project safely and effectively.
Materials and Tools
Tools
Shovel
Maddox (very helpful for digging the exact sizes of trench)
Circular Saw or Miter Saw
Screw Gun or Drill
Hammer or Mallet
String and Stakes
Materials
4″ X 6″ boards
2″ X68″ boards
3.5 inch screws
Metal Stakes or Metal Anchoring Straps
4″ X 4″ wooden post
4 bags of playground sand (or other filler material)
Building the Pit
Step 1: Mapping Out Your Area
As mentioned before, it imperative that you make sure your area is safe to dig in before you start digging. If you haven’t done that yet, stop what you are doing and contact your local agency responsible for maintaining the information about your underground public utilities.
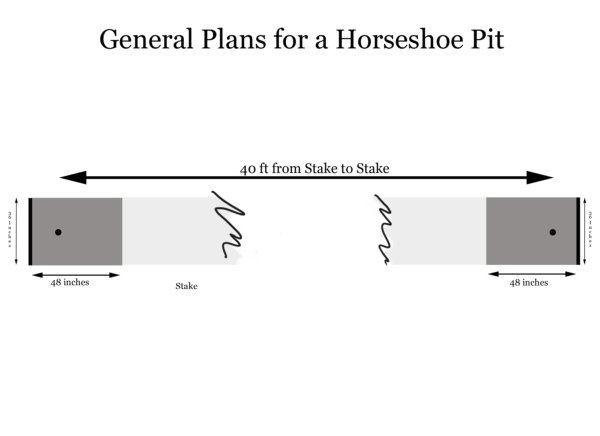
Using a set of stakes and some string line, map out your pit area. You want to make sure you map the total distance between the two pits. The distance between the stake in each pit is 40 feet. You set the stake in the pit about 18 inches from the backstop of the pit. The overall depth of each pit is 4 feet. So, you can plan on you overall distance being 44 feet. Therefore, you should make sure your overall length of your area is 43 feet from backstop to backstop. Also, your pit is 3 feet wide, so make sure you also account for that.
Here is a diagram that will help you layout your area.
Step 2: Digging Out the Pits
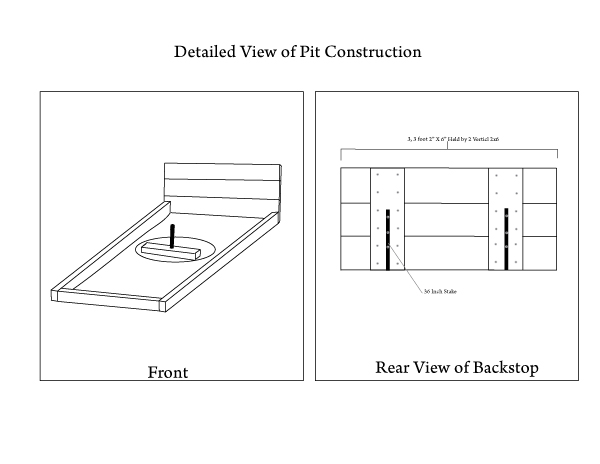
Once you have laid out the orientation of your pits you need to start digging the footing for the pits. You need to dig the pits about seven inches deep (you will use six inch deep lumber for your side supports) and four feet by three feet. About 18 inches from the back of your pit you will dig a deeper trench where you will put a 4 inch by 4 inch post. You drill a whole through the 4 x 4 post to put the horseshoe stake through. This will keep the stake from rattling and shaking when players hit the stake. Below is another diagram and a photo that show how the dig-out should look.
Step 3: Building the Pits
Once you have dug out the pit areas you are ready to start cutting the lumber and putting the pieces together. You can use different kinds of lumber other than what I suggested above, but remember, this lumber is going to take abuse when it gets hit by horseshoes, so weigh that accordingly. We used 4X6 for our front piece of the pit because that piece takes more hits than any other part of the pit. We used 2X6 on the sides and 2X6 stacked three hight to make the back wall.
After you have cut the pieces use screws to assemble the pit. If you use nails it will shake apart and will be loose before you finish (because every time you put another nail in you will be banging it out of alignment). 3.5 inch outdoor woodscrews will work great.
Obviously, be careful when you cut the wood and screw the nails. If you don’t know who to use the tools or have never used them before, get some help. Wear your goggles, gloves, boots, ear protection, and make sure you keep your work area clean so you don’t trip on something, etc. Take your time. This is supposed to be fun and no one needs to make a trip to the hospital because they made a mistake.
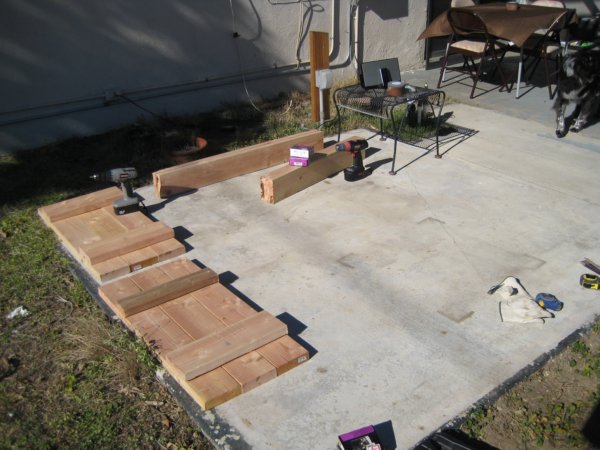
Here’s a picture of our assembly area as we were putting the pieces together. As you can see we ran out of 2X8 for the back and used a piece of 2X4 for the rear support. It worked fine, but was not as aesthetically pleasing for the lack of symmetry.
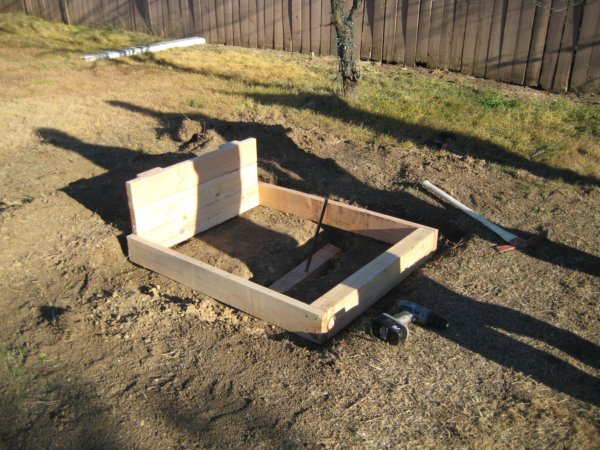
Here is what the final product looks like in the pit. Don’t forget to take the 4X4 and drill a hole in it just larger in diameter than the horseshoe stake.
Step 4: Anchoring the Pits
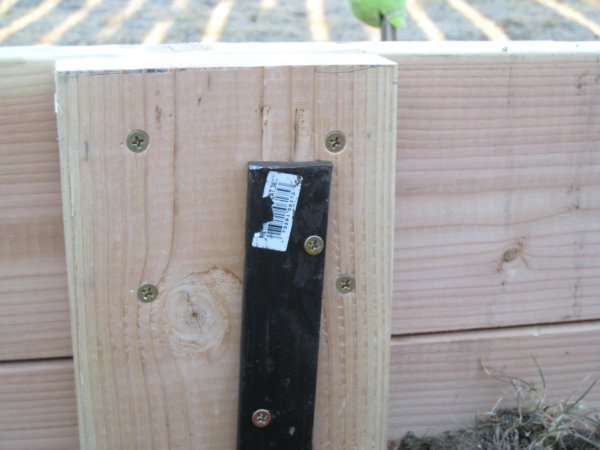
Before you fill the pits with sand and start playing you want to anchor them in place. We were able to locate some four foot long anchoring straps at our local hardware store. They were pretty inexpensive and they came pre-drilled with holes for the screws. They were a lot cheaper than steel stakes were and they mounted flush with the backstop.
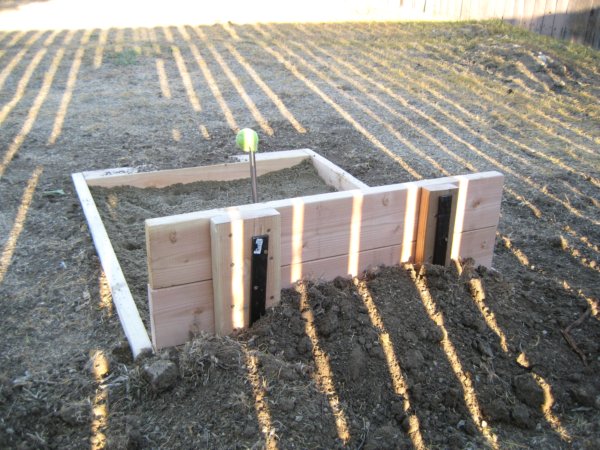
Use two straps per backstop. Take a mallet (not too heavy, you do want to be able to control it, after all) and slowly start to work the strap into the ground. Once you get it low enough to where it is below the top of the backstop you can screw it in. Here are a few pictures to show you what I mean.
Step 5: Fill in the Pit and Have Fun
After you have anchored the pits all you need to do is fill them in. Compact some soil around the 4X4 post holding the stake. Then compact dirt around the exterior of the pit walls. Finally, pile the remaining dirt that you dug out earlier along the exterior of the of the backstop to add support and to help dampen the noise when the backstop is struck (it will happen more than you can image…). Finally, take some playground sand or some other suitable filler material and fill in the pit. We also cut a couple of tennis balls to put over the stakes when we weren’t using them so no one would get hurt by running into or falling on the stakes.
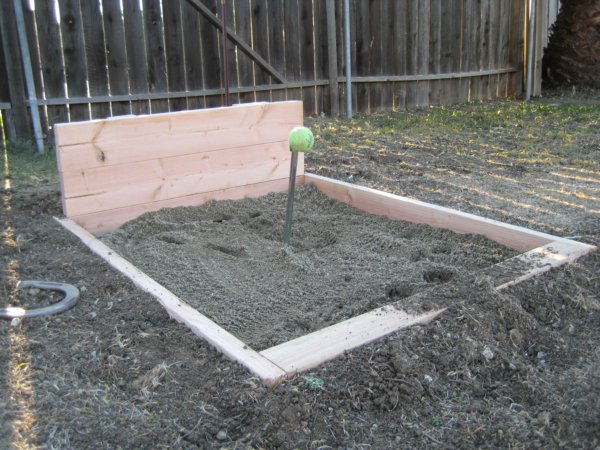
Here’s a picture of the final product. I hope you enjoy this. If you find it helpful, please leave a comment. Also, remember, we keep this blog up by the links we have within it. If you find something that might help, please check it out.


